Janu Sirasana
Janu Sirsasana ( Janu means Knee and Sirsa means Head) is the Head to Knee pose although for many of us it is easy to bend the knee to bring it towards the head.
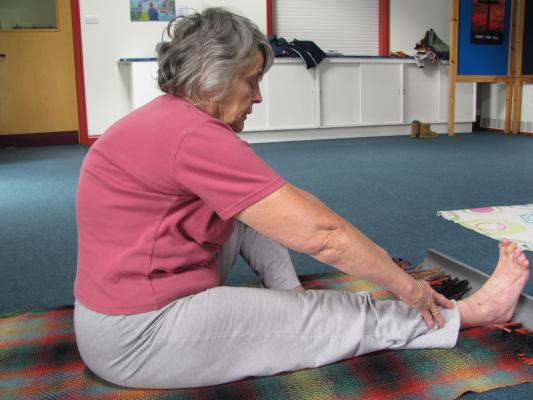
This posture needs to be done with great care if you have back problems. The bend is from the hip, the back should be in neutral spine position. In the photo we have shown a student who is trying too hard and is curving the upper back more than it should be curved. The lady concerned has osteoporosis. It is a common feature with osteoporosis that the upper back begins to hunch. This makes it harder to have an open chest and to breathe deeply.
Iyengar in his book Light on Yoga said that "this asana tones the liver and the spleen and aids digestion." "It also tones and activates the kidneys"
It does other things too. It stretches the hamstrings. If practiced properly it extends the back. It has a calming effect. In my early days of teaching and learning from the Leicester Iyengar cell, I was taught to use it when people where over-excited and tense. It was recommended as helpful for people with mental illnesses where the illness made people feel too high. Conversely it was not recommended that is should be held for any length of time for anybody with depression.
Start by sitting in Dadasana. Your legs are straight out in front of you and your back is straight. Bend one leg so the heel comes into the groin area ( this will enable you to achieve a lock when you move on to exploring bandhas)
Gently align your trunk so that your spine is in line with an imaginary line running up the centre of the extended leg. This will involve twisting of the torso.
Stretch upwards first, feeling bending coming from the hip, keep your spine extended and then outwards as far as possible before allowing the arms to come down and hold the legs.
Let this be your resting position. As you breath in and breath out softly, you may find on an out breath that you can feel your body wanting to go lower. Go with the flow and allow this lowering to happen softly.
If you want to, use a belt and take it around your feet and hold the ends. Make sure your arms are allowing your chest to be open. To check this, keep your arms in the position you have them in and lift up. If you have your arms in the right place your shoulder blades will be close to each other and your chest will be open.
If you have brought your arms in too much, when you sit up your shoulders will be hunched and your arms will be compressing your chest and you'll look depressed.
So always remember to work with the arms allowing you to have an open chest.
Tempting as it is, because it enables you to take your head closer to your knee, do not curve your upper back. It does have a natural curve but don't curve it more than its natural shape. If you are already beginning to get a hunch in your upper back, experiment with holding your arms behind your back, pulling your shoulder blades closer and then holding that back shape as you lean forward from the hips.
If you have tight hamstrings, your knees will want to lift up off the floor. Work as hard as possible to keep the extended leg as flat on the floor as possible. However you do not want to tear your hamstrings, so if you need to lift your knees a bit, do so. Consciously work to lower the knees as you relax into this posture.