Utthita Parsvakona
Utthita Parsvakonasana .. Utthita means extended.. Parsva is the side... kona is an angle.. so this is an extended side pose or extended lateral angle pose.
This pose tones the legs, knees and ankles. Good for those who want to go ski-ing! It also opens out the chest and creates a stretch along the side of the body. The psoas gets stretched.
For those suffering from constipation, the posture aids elimination and improves the peristaltic activity.
There are two ways of postitioning the stretched arm, one is shown in the beginner's pose and the other in the picture. There are also two ways of positioning the arm that goes down to the floor, either in front of the leg or behind it. When you practise this posture observe the difference in your body when you place your arm in front of the leg and behind.
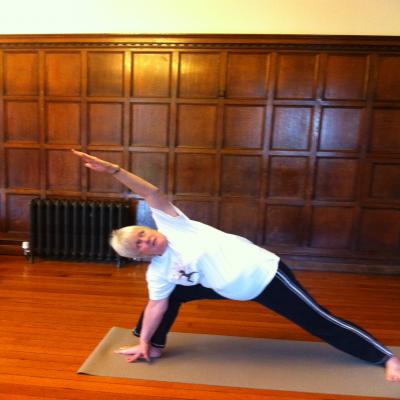
To begin with, take your legs are far apart as you can. Turn your right foot to look towards the right and let the left foot look slightly towards the right. Below is a photo of how a beginner might tackle the pose.
Try very hard to make sure that there is as much weight on the left foot as the right as you bend your right knee. Try to lift both the insteps and to have the outer edge of the left foot actively engaged with the floor.
Check your knee. It needs to be vertically above your foot or slightly looking to the back of you. Do not let it point forwards. I was taught that it could damage the patella, the knee cap if a student slipped with the knee pointing forward. So let's play safe.
Rest your right arm on the thigh.
Lift your left arm above your head. The more you stretch it to make a straight line, the better.
You should feel a stretch along your side and you should have the feeling that the stretch continues into the arm.
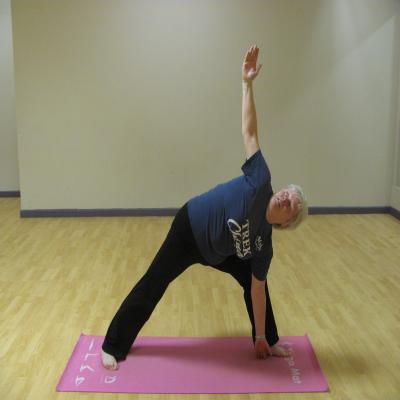
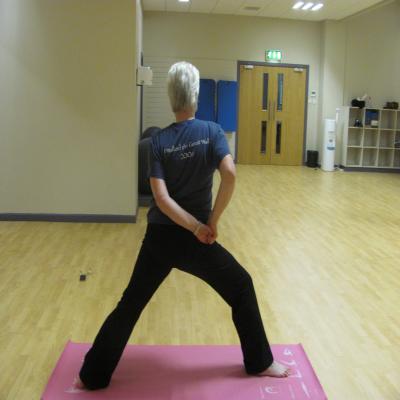
When we continue into the fuller posture, we can often feel that our trunk is turning to follow the bent knee, rather than facing forwards. If you are uncertain whether or not your trunk is in the right allignment investigate the following posture, as shown in the two photos below. The first is from in front.
If you have bent the right knee, take the left arm behind your back and try and catch hold of your right thigh. You will know straight away whether or not your trunk was in the alignment it should have been and you will be able to take the feeling you had while doing this, into your final Utthita Parsvakonasana.
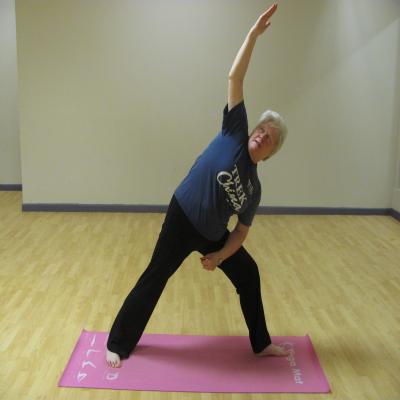
This shows what are you are trying to do from behind.
You are trying to bend your knee so that your thigh becomes parallel to the floor. As you get better at this pose, you may find you need to take your feet further apart to enable you to get the right angle effect at the knee. Ideally the lower leg is at right angles to the thigh.
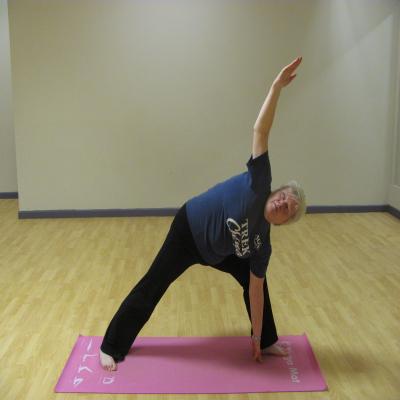
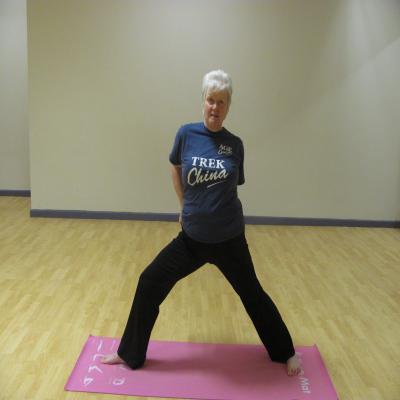
When you see a student who thinks they are stretching their arm over their head, but they are not getting the full range, as a teacher you can help them. In the photo above the student thinks the arm is in the right place but it should be much nearer the head and there should be a beautiful line through the stretched leg, the side and the arm.
Ask the student to relax the arm like a rag doll. Then take the arm and bring it down towards the stretched leg and then bring it forward and upwards. Here's a video so you can see this.
Never try and push the arm above the head, further over. You could damage the shoulder. Always bring the arm down, forward and then up and always gently, stopping if there is any feel of resistance from the arm.
We are all different shapes and sizes and it would be a very boring world if we were all the same. Allow your students to enjoy being themselves :- )